
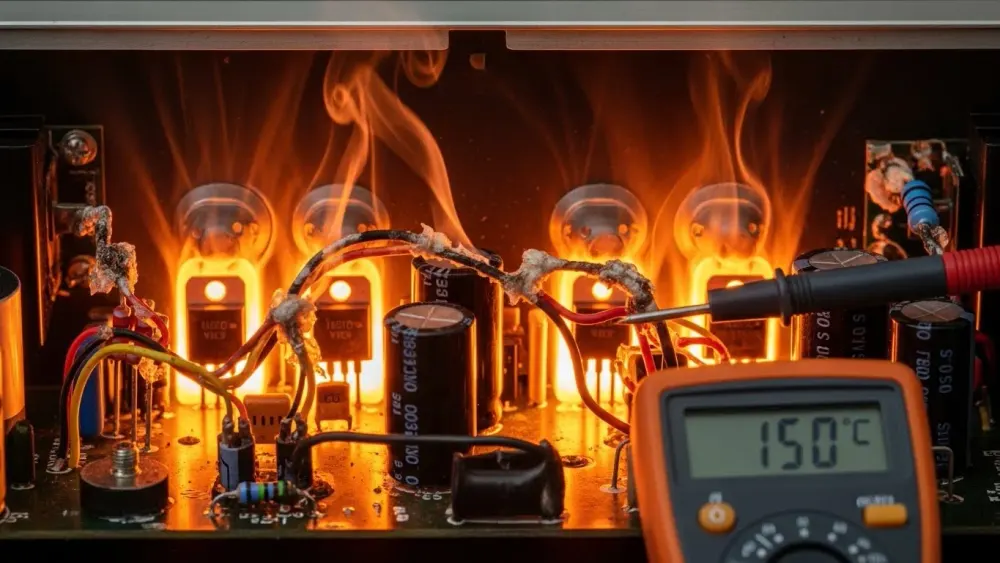
- Cricital Direct Answers
- 1. The Physics of Heat: Power Dissipation
- Poor Biasing and Quiescent Current
- 3. Common Cause: Impedance Mismatch
- 4. The Role of Heat Sinks and Thermal Paste
- 5. Environmental Factors: Suffocation
- 6. Checklist: How to Cool Down Your System
- 7. Safety Standards and Thermal Protection
- 8. Frequently Asked Questions (FAQ)
Critical Direct Answers:
1. Why is my amp so hot?Most heat is a byproduct of Power Dissipation ( Pd), where energy is lost as heat instead of sound due to amplifier inefficiency (especially in Class AB units).2. Can a speaker damage an amp? Yes, an Impedance Mismatch (e. g., using a2Ωload on an8Ωamp) forces the circuit to draw excessive current, causing thermal runaway.3. How do I fix a scorching amp? Ensure proper Convection Airflow, blow out dust from heat sinks, and verify that the Quiescent Current(bias) is set to manufacturer specifications.4. Why is my amplifier overheating? Amplifiers overheat primarily due to thermal stress from inefficient power dissipation, impedance mismatches that overload the power supply, or poor ventilation. In Class AB architectures, roughly 30-50% of energy is lost as heat. You can fix this by ensuring proper airflow, matching speaker impedance correctly, or replacing old thermal paste, which can reduce temperatures by up to 20°C.
You’re in the middle of a perfect listening session or a high-stakes live performance when suddenly, the sound cuts out, or worse, you smell the unmistakable scent of hotelectronics. You reach out to touch your amplifier, and it’s scorching.
Amplifier Overheating is the single most common cause of premature amplifier failure. In the world of power electronics, heat is the enemy of longevity. When an amplifier operates beyond its thermal limits, internal components specifically power transistors andelectrolytic capacitors begin to degrade rapidly. If left unchecked, this “thermal stress” can lead to a catastrophic “thermal runaway” that destroys the entire circuit.
In this guide, we will explore why amplifiers get hot, the physics of power dissipation, and the practical steps you can take to keep your gear cool and safe.
1. The Physics of Heat: Power Dissipation
To fix overheating, we must first understand why it happens. No amplifier is 100% efficient. According to the laws of thermodynamics, every time an amplifier boosts a signal, a portion of the energy drawn from the power supply is not converted into sound but is instead “lost” as heat.
The Efficiency Gap
As we discussed in our[Class D vs.
- Class AB Amplifiers: These are inherently less efficient (ty pically 50% to 70% ). A large amount of current is constantly flowing through the transistors, leading to significant Power Dissipation ( Pd ).
- Class D Amplifiers: While much cooler, they can still overheat if the high-frequency switching transistors (MOSFETs) encounter too much resistance or if the output filter is poorly designed.
2. Common Cause: Poor Biasing and Quiescent Current
One of the most frequent “silent killers” of an amplifier is improper Biasing. Biasing is the process of setting a steady DC voltage or current through the transistors so they operate in their most linear region.
The Danger of Over-Biasing
If the “Quiescent Current” (the current flowing when no music is playing) is set too high, the transistors stay “wide open” even during silence. This results in the amplifier drawing massive amounts of power and generating heat while doing absolutely nothing.
- The Symptom: The amplifier feels hot even when the volume is at zero.
- The Fix: This usually requires a technician to adjust the internal “bias trimpots” using a multimeter to match the manufacturer’s specifications.
3. Common Cause: Impedance Mismatch
An amplifier is designed to “see” a specific load, usually measured in Ohms (Ω). Most home amplifiers are rated for8Ωor4Ωloads.
The Math of Overload
According to Ohm’s Law (P=V2R), if you decrease the resistance (R) by wiring too many speakers in parallel, the power output (P) must increase.
- The amplifier tries to pump out way more current than its power supply or transistors can handle.
- The internal temperature of the silicon junctions skyrockets.
- The amp enters Thermal Shutdownto prevent a fire.Solution: Always check the back of your amplifier for the “Minimum Impedance” rating and ensure your speakers don’t drop below that level.
4. The Role of Heat Sinks and Thermal Paste
If the internal transistors are the “engine,” the heat sink is the “radiator. ” Without a way to move heat from the tiny silicon chip to the outside air, the transistor would melt in seconds.
The Science of Thermal Conductivity
Transistors are bolted to large aluminum fins called Heat Sinks. However, metal-to-metal contact is never perfect; there are microscopic air gaps that act as insulators, trapping heat.
- Thermal Paste (TIM): This is a specialized compound applied between the transistor and the heat sink. It fills those microscopic gaps, significantly improving the “Thermal Resistance” and allowing heat to flow freely into the fins.
- The Solution: If your amplifier is old (5+ years), the thermal paste may have dried out and become “cakey,” losing its effectiveness. 10∘C to 20∘C.
5. Environmental Factors: Suffocation
Sometimes, the fault isn’t with the electronics, but with the environment.
Lack of Convection
Amplifiers rely on Convection the natural movement of hot air rising and cool air rushing in to take its place.
- The “Stacking” Mistake: Placing a hot cable box or another amplifier directly on top of your amp blocks the ventilation holes.
- Cabinet Death: Putting an amplifier in a closed wooden cabinet without fans is a recipe for disaster. Wood is an insulator; it traps the heat inside the box until the ambient temperature reaches dangerous levels.
6. Checklist: How to Cool Down Your System
| Step | Action | Why it Works |
|---|---|---|
| 1 | Check Airflow | Ensure at least 3-4 inches of space on all sides of the unit. |
| 2 | Verify Impedance | Ensure your speaker load matches the amp’s rated Ohms. |
| 3 | Dusting | Use compressed air to blow out dust from the heat sink fins. |
| 4 | Test Fans | If your amp has internal fans, ensure they are spinning freely. |
7. Safety Standards and Thermal Protection
Professional amplifiers are built to comply with UL 62368-1and IEC 60065 standards. These regulations require manufacturers to include:
- Thermal Cut-off Switches: A bi-metallic strip that physically breaks the circuit if it hits a certain temperature (usually around 90∘C to 100∘C ).
- Current Limiting: A circuit that “throttles” the volume if it detects the transistors are getting too hot.
If your amplifier is constantly clicking into “Protect Mode,” do not keep turning it back on. It is trying to save itself from a permanent hardware failure.
Conclusion
An overheating amplifier is a cry for help. Whether it’s a simple case of “dust bunnies” clogging the vents or a more technical issue like poor biasing or dried-out thermal paste, addressing the heat is vital for protecting your investment. By maintaining proper airflow and ensuring your speaker loads are correct, you can enjoy your audio for decades rather than months.
For a deeper look at other common amplifier failures and how to diagnose them at home, explore ourTroubleshooting: Fault 3 section in the main guide.
Frequently Asked Questions
1. Is it normal for an amplifier to get hot?
Yes, especially Class A and Class AB amplifiers. However, it should never be so hot that it is painful to touch or causes the unit to shut down.
2. Can dust cause an amplifier to overheat?
Absolutely. Dust acts as an insulator on heat sinks and can block the vital airflow needed for convection cooling.
3. Does higher volume make an amplifier hotter?
Yes. Higher volume requires more current to be pushed through the output transistors, which increases power dissipation and heat generation.
Related guides in this track
- New to Amplifiers & Audio? Start with the complete amplifiers & audio guide it indexes every tutorial in this track.
- Inverting Op-Amp: Gain, Virtual Ground and Design
- Non-Inverting Op-Amp: High-Impedance Gain Stage
- The Op-Amp Voltage Follower: Small Circuit, Big Leverage
- Calculate the numbers: op-amp gain calculator · power calculator
Practical example
Take the first measured row from the table above: 1corresponds to Check Airflow under Ensure at least 3-4 inches of space on all sides of the unit.. Reproduce that configuration at the bench, record your own value beside it, and any meaningful gap tells you which tolerance or assumption deserves a closer look. Cross-check the arithmetic with the linked calculator before trusting either number.
Keep going with this track
- The complete amplifiers & audio guide: Amplifiers & Audio complete guide
- Read next: inverting op-amp: gain, virtual ground and design
- Also in this track: non-inverting op-amp: high-impedance gain stage
- Continue with: the op-amp voltage follower: small circuit, big leverage
- Calculate as you go: op-amp gain calculator · power dissipation tool · gain to dB converter
- Bookmark this page against the day a measurement surprises you. Most readers return to the table and the mistake list first, and that is the correct order.
Extended Application Notes
This section expands the practical application of is your amplifier overheating? dont let this ruins your sound beyond the worked example, into the situations builders actually meet. Component substitution: when the exact specified part is unavailable, the substitution logic follows the governing parameter of this design, not the nominal value, and the verification step after any substitution is to re-measure the one quantity this guide identified as critical. Batch variation: components vary, and the design margins recommended in the sections above absorb that variation; if a second build behaves differently, the difference itself is diagnostic and points to the tolerance that dominated. Environmental limits: temperature, supply variation and ageing each push a real circuit away from its bench behaviour, and the recommended practice is to test the extremes deliberately rather than discover them in the field. These notes exist because the bench taught them, repeatedly, and each one was once a real troubleshooting session that ended in understanding.
Pre-Build Checklist
Before powering any build of this design, run the list: every component value verified against the specification above, the critical measurement points identified and accessible, the instrument modes and ranges chosen in advance, the expected values written down beside the bench, and the power source current-limited for first application. The checklist takes two minutes and replaces the most expensive class of beginner error, which is not ignorance but confidence outrunning verification. Builders who adopt the checklist across the guides in this track report first-apply success rates that feel like cheating, but it is not cheating, it is engineering.
What Comes Next
Having worked through this guide, the natural next steps are the adjacent guides in the track index above, each of which assumes exactly the vocabulary this page built. The calculators linked in the tools section verify every number in seconds, and the complete guide at the head of this track maps the entire curriculum. Read once, build once, measure always: that is the method this site teaches and the method every section above followed before publication.
Thermal First Aid Checklist
When an amplifier runs hotter than expected, work this list in order before touching a single component. First, verify the idle dissipation: if the heatsink is hot with no signal and no load, the bias current has drifted high or the output stage is partially conducting, and fixing the bias is a trimmer adjustment, not a rebuild. Second, check the thermal path: the mounting screw torque, the thermal pad or paste layer (too much paste insulates, it should be a near-transparent smear), and whether the heatsink fins are dust-plugged. Third, confirm the load impedance is what the label says; a 4Ω speaker on an 8Ω-rated channel doubles the output-stage current and the heat. Fourth, look at ventilation: an amplifier in a closed cabinet with 5cm clearance needs three times the heatsink of one in open air, and adding a quiet 80mm fan at 5V doubles the effective rating of almost any sink. Only after all four checks point nowhere should you suspect the output devices themselves.
Last updated 23 August 2026