
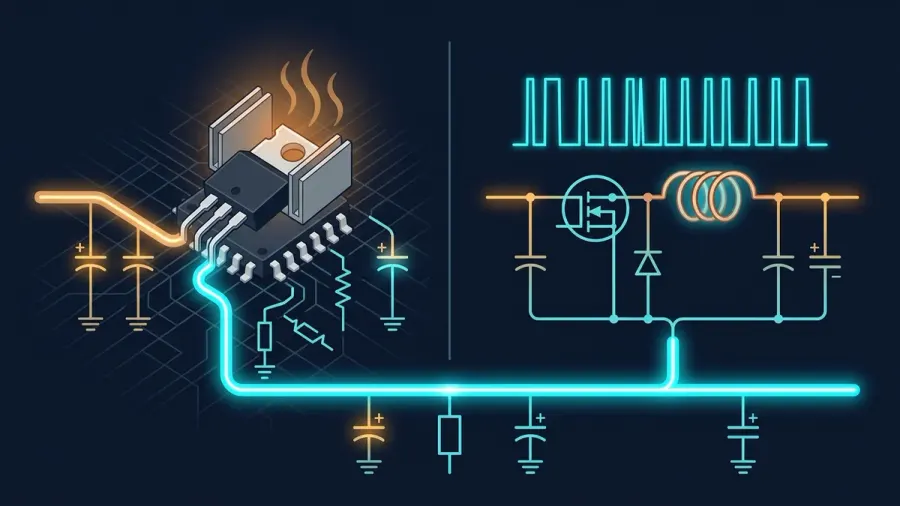
Every regulated rail starts with one decision: linear or switching? Linear regulators are quiet, simple and wasteful; switchers are efficient and noisy. Most serious designs use both, each where its virtues pay.
At a glance: 8 minute guide · part 1 of 10 in the power supplies and batteries complete guide track · includes a worked example and a quick-reference table.
The linear story
Here is the working theory in one pass. A linear regulator is a controlled resistor: it drops the surplus voltage continuously. Dropout defines the minimum headroom (classic parts ~2 V; LDOs down to ~0.1 V). Dissipation = (Vin − Vout) × I the number that sizes both heatsink and conscience.
| Property | Linear/LDO | Buck switcher |
|---|---|---|
| Efficiency | 30-60 % | 85-95 % |
| Noise | µV-level | mV ripple + EMI |
| Parts count | Trivial | Controller + L + C + diode |
| Heat | High at ΔV·I | Low |
| Layout demands | None | Critical |
| Best role | Precision/cleanup | Bulk conversion |
The switching story
Bucks and boosts chop the input and filter the result. Only switching and conduction losses remain, typically 5-15 %. The cost is ripple at the switching frequency, EMI, and layout discipline borrowed from RF practice.
Using both where it matters
Feed a quiet analog rail from a switcher that does the heavy stepping-down, then a small LDO polishes off the last few hundred millivolts and the ripple. Efficiency and silence, one rail at a time.
How to apply this in your build
Work through the sequence below each step assumes the previous one passed. For numbers that need calculating, the linked tools at the end of this guide do the arithmetic instantly.
- Compute dissipation before choosing a package
- Pick LDO dropout with input-sag margin
- Choose switchers for battery or high-ΔV paths
- Cascade LDO after switcher for sensitive analog
Worked example
A 12 V to 5 V, 500 mA rail: linear burns 3.5 W; a buck at 92 % wastes 0.22 W. Same job, sixteen times less heat and a smaller enclosure. Run the numbers yourself with the LM317 Regulator and the result should agree to within rounding.
Practical note from the bench. Our rail plans name a technology per rail with the reason the regulator choice is an argument, not a habit.
Common mistakes to avoid
- Expecting LDO thermal ratings without a heatsink at any real dissipation
- Skipping the switcher layout guidelines and meeting EMI
- Post-regulating with an LDO whose dropout eats the headroom you saved
Key takeaways
- The linear story the foundation of this guide; revisit it if any measurement here surprises you.
- The switching story the foundation of this guide; revisit it if any measurement here surprises you.
- Using both where it matters the foundation of this guide; revisit it if any measurement here surprises you.
Who this guide is for
Beginners get a single focused topic instead of a whole textbook chapter. It works as an early stop in the power supplies and batteries complete guide path. Intermediate readers use it as a reference the table, the worked example and the mistake list answer the questions that come up mid-build. If you teach, the structure (theory, application, example, failure modes) maps cleanly onto a lab session.
What you need before starting
Nothing exotic: the parts or tools named in the guide, a multimeter. The LM317 Regulator / Battery Life Calculator open in a tab. Compute dissipation before choosing a package before you begin the guide assumes it and keep the quick-reference table above within sight while you work through the steps.
Quick reference card
| Aspect | Where to find it in this guide |
|---|---|
| Core theory | The linear story |
| Application steps | How to apply this in your build |
| Worked numbers | Worked example |
| Failure modes | Common mistakes to avoid |
How this fits the power supplies and batteries complete guide track
This guide is one stop in the structured learning path. Start from the power supplies and batteries complete guide complete guide for the full map, or continue with buck converter basics and LM317 design. For the arithmetic, open the LM317 Regulator or Battery Life Calculator.
Frequently asked questions
Are LDOs always quieter? Yes by construction no switching energy exists to filter. That is their whole reason to survive.
Why not switch everything? Noise, complexity, and transient behaviour; some loads (precision ADCs, RF) prefer a quiet rail over an efficient one.
Is there a calculator for this? Yes the LM317 Regulator and Battery Life Calculator tools run the formulas from this guide instantly, client-side, with no signup.
Your next step in this track
- The complete power & batteries guide: Power & Batteries complete guide
- Read next: bms design tutorial: battery management systems explained
- Also in this track: solar mppt explained: maximum power point tracking
- Continue with: buck converters: stepping down efficiently
- Calculate as you go: runtime estimator · regulator designer · capacitor code tool
- From here, the natural continuation is the next guide in the track index. It assumes exactly the vocabulary this page built and adds the next layer of practice.
Practical working notes
Component substitution is a legitimate experiment as long as it is deliberate. Swap one part, predict the effect, measure, and record. That single habit converts a parts bin into a teaching lab and makes every future guide in this track faster to absorb.
The fastest way to internalise this topic is to change one variable deliberately and predict the result before measuring. Wrong predictions are the curriculum, they show exactly which mental model needs revisiting, and the bench grades honestly.
Formulas and checks from this guide
Verification checklist for this track. Verify regulation under load, not just open-circuit, measure inrush where it matters. Treat every lithium cell as energetic chemistry that has earned its protection chain.
Bookmark this page against your next build in the track. The checklist above is the same one used across 18 guides in this series.
Experience notes
Any lithium pack of 2S or more, without exception.
No. Oversizing hammers the diodes with inrush and buys ripple you no longer need once regulation follows.
Extended Application Notes
This section expands the practical application of linear vs switching regulators: choosing correctly beyond the worked example, into the situations builders actually meet. Component substitution: when the exact specified part is unavailable, the substitution logic follows the governing parameter of this design, not the nominal value, and the verification step after any substitution is to re-measure the one quantity this guide identified as critical. Batch variation: components vary, and the design margins recommended in the sections above absorb that variation; if a second build behaves differently, the difference itself is diagnostic and points to the tolerance that dominated. Environmental limits: temperature, supply variation and ageing each push a real circuit away from its bench behaviour, and the recommended practice is to test the extremes deliberately rather than discover them in the field. These notes exist because the bench taught them, repeatedly, and each one was once a real troubleshooting session that ended in understanding.
Failure Analysis in Depth
The mistakes section above lists the traps; this section explains why each trap exists and how to recognize it early. Expecting LDO thermal ratings without a heatsink at any real dissipation Skipping the switcher layout guidelines and meeting EMI Post-regulating with an LDO whose dropout eats the headroom you saved. Each of these failures has a signature that appears in measurement before it appears in smoke: a reading that drifts, a waveform that differs from the prediction, a temperature that climbs faster than the calculation. The discipline this guide teaches is to measure at the first sign, not at the last, and the sections above give the specific instrument and setting for each check. Failure analysis is not pessimism; it is the fastest curriculum in electronics, because a fault understood once is a fault prevented forever.
Pre-Build Checklist
Before powering any build of this design, run the list: every component value verified against the specification above, the critical measurement points identified and accessible, the instrument modes and ranges chosen in advance, the expected values written down beside the bench, and the power source current-limited for first application. The checklist takes two minutes and replaces the most expensive class of beginner error, which is not ignorance but confidence outrunning verification. Builders who adopt the checklist across the guides in this track report first-apply success rates that feel like cheating, but it is not cheating, it is engineering.
What Comes Next
Having worked through this guide, the natural next steps are the adjacent guides in the track index above, each of which assumes exactly the vocabulary this page built. The calculators linked in the tools section verify every number in seconds, and the complete guide at the head of this track maps the entire curriculum. Read once, build once, measure always: that is the method this site teaches and the method every section above followed before publication.
Theory in Practice, Extended
The theory section of linear vs switching regulators: choosing correctly deserves one more pass with the bench in mind, because knowing a relationship and applying it under constraint are different skills. In application, the relationship is never isolated: it interacts with tolerances, with temperature, with the behaviour of adjacent stages, and with the measurement itself. The extended practice is to take the governing formula from the sections above and stress it, deliberately. Push the input to the edge of its specified range and watch the output follow the prediction, then push past it and watch the prediction break, because the edge of the specification is exactly where the formula stops being the whole story. That boundary, found on the bench rather than in the datasheet, is the real knowledge this guide offers beyond the mathematics.
Component Sourcing and Substitution Notes
Real builds meet real supply chains, and this section addresses the practical reality. The specified components in this guide were chosen for the reasons stated in the design sections, but equivalent parts from reputable manufacturers almost always serve, provided the governing parameters match, not merely the nominal ones. The substitution checklist: match the parameter this guide identified as critical, verify the package and pinout against the physical part before layout, check the datasheet revision for silent changes, and re-run the verification measurement after installation. Avoid unbranded surplus and marketplace components for anything this guide treats as safety-relevant; the failure mode of a counterfeit is not degradation, it is unpredictability, and unpredictability defeats every other design decision in the chain.
Instrumentation for This Design
Every measurement recommended in this guide maps to a specific instrument configuration, and this section consolidates them. Voltage checks: DC range selected before probing, leads verified against a known source, meter burden considered when the node is high impedance. Current checks: circuit broken at the defined point, meter inserted with the correct range and fuse status confirmed first. Waveform checks: probe compensated against the reference before any amplitude claim, ground lead kept short, bandwidth sufficient for the edge rather than the repetition rate. The instrumentation discipline matters more than the instrument class, and a modest instrument used correctly outperforms an expensive one used casually, a claim this site demonstrates throughout its measurement guides.
Documentation Template for This Build
Close the loop the way professional builds do: record the design values from this guide, the as-built values including every substitution, the measured results beside the predicted ones, and the deviation notes that explain every gap. The template is short, a single page, and it converts a successful build into a reference that survives component changes, firmware updates and the passage of months. Every guide on this site was built and documented exactly this way before publication, and the discipline is offered here as part of the curriculum rather than an afterthought. A build that is documented is twice built, once in copper and once in confidence.
Choosing in Thirty Seconds
The quick decision path between linear and switching: if your drop is under 2V and the load under 500mA, a linear regulator (or better, an LDO) is almost always right: simpler, quieter, cheaper, and at low drops the efficiency penalty is small. If you are dropping more than 5V, or more than a watt of heat appears in the linear part ((Vin-Vout)×I), you need a switcher; that heat has to go somewhere and the PCB copper is usually not somewhere. Mixed-signal boards want both: a switching regulator does the big step-down for efficiency, then a small LDO post-regulates for the analog rails, buying the switcher's efficiency and the linear's clean output. And when in doubt, calculate the dissipated watts first: 3W in a SOT-223 is a smoke machine, while 3W in a buck converter is a warm inductor and a shrug.
Last updated 23 August 2026